Monday, April 9, 2018

Cover Me


Now that the boat has been flipped back upright, its time to start focusing on the deck.   I knew I had to refasten the coverboards, as they were the last remaining areas with galvanized steel (that had started to rust, the sheerplanks still have their steel, but they seem to be fine).  I also suspected I'd find some areas that needed repair due to iron sickness.

I started off by removing the port side coverboard.  it was just like old times removing old screws, but I have gotten a lot better.  Don't forget, heat is your friend. heat a screw for a minute with a soldering gun, if it doesn't move, do another minute.   I had pretty good success, and the only broken screws were caused by my own impatience.

Once the coverboard came off, it was prety clear that the batten that is used at the inboard seam of will need to be replaced.  to do that, I'll need to remove a bunch of the fasteners at the end of each deck plank so that I can spring the planks back to get access to the full batten.  This work goes pretty easy with the 3/4" brass screws holding down the deck.  I've read that I shouldn't reuse any screws so all of these will be replaced.

I'll also need to drill and plug all of the scew holes in the sheer plank... fun! 

One of the main reasons I had decided not to refasten the sheer planks was that they had a lot going on,   screws from the deck stringers, screws from the coverboards, as well as the regular screws into the ribs.  Now that I had the coverboards off,  I thought - for about a split second - about doing the sheer planks.    I don't have time for that nonsense.

hope to have the deck planks sprung this weekend.  Seems my completion date keeps pushing out a bit, but still have a fighting chance to make it on the water for the May 20 race. 

Ordered the sails today. looking forward to seeing them full.


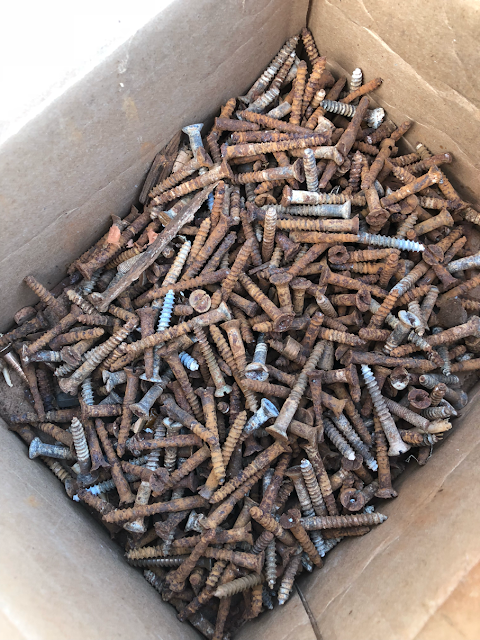
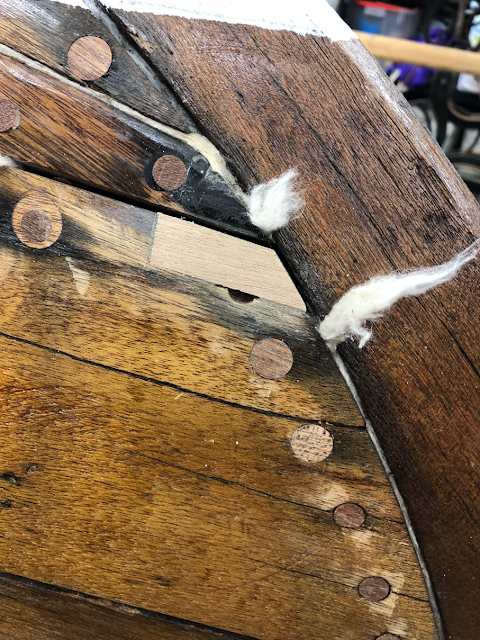
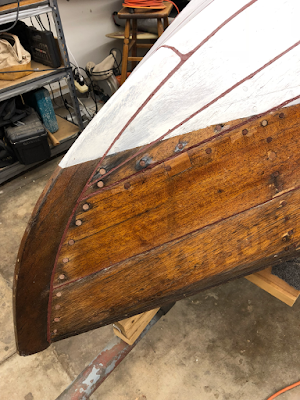
View from the bow of the coverboad area

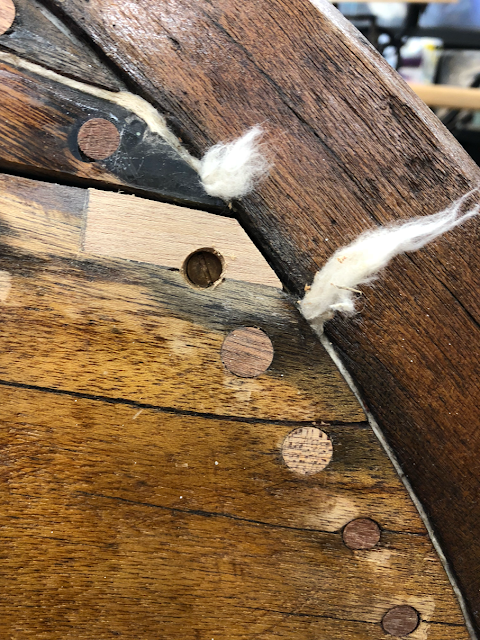
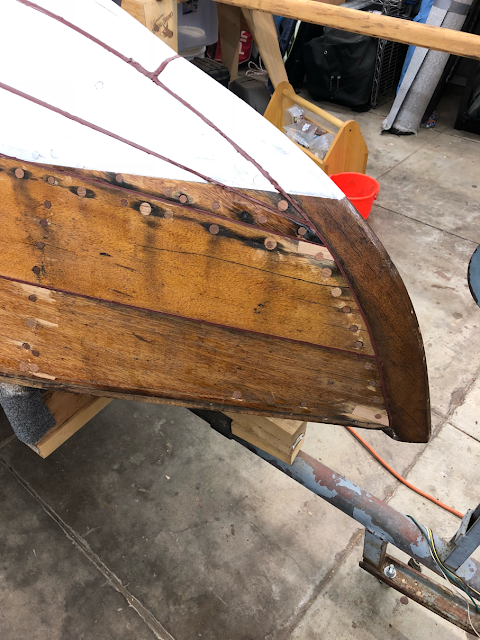
the batten looks particularly bad right around the shroud plates.  Hoping this is isolated to the batten.

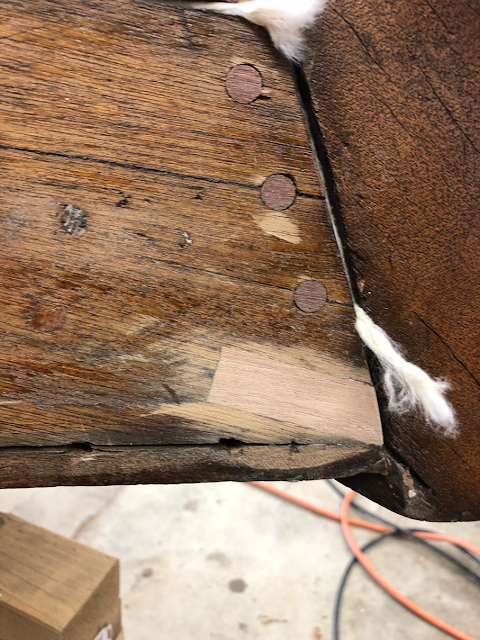
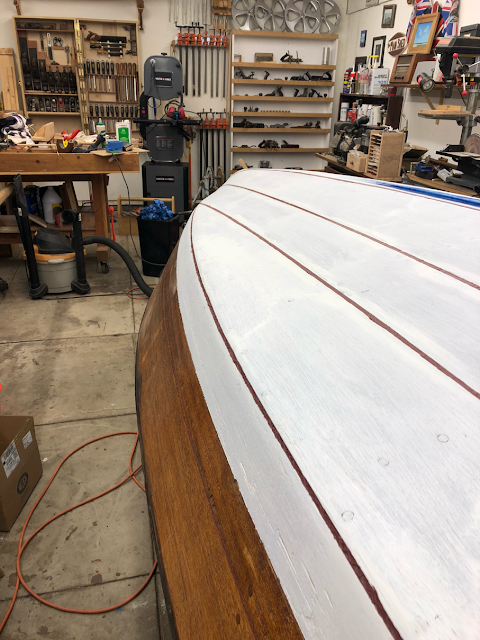
Here are the deck planks sprung at the aft quarter.  The batten is in better shape back here, but the whole thing will be replaced.


Tuesday, March 20, 2018

Turning the Corner

After many years of working on refastening in fits and starts, the hull is finally solid.   Last weekend, friends, neighbors, and strangers converged on my backyard to help turn Shady Lady.  We had a crew from Snipe Fleet 24, several neighbors, and even a Yoga instructor from Boston, who was staying at my neighbors air bnb.

Thanks to everyone for the muscles and the good company.

After the turn was complete, we even had a fleet meeting in my driveway, just like the meeting we had to restart the fleet 6 years ago!

It was nothing fancy, good old fashioned manpower got her off the trailer, onto some sawhorses, then lowered to the ground, and manually rolled over.   I was worried about whether this would be safe, but in the end, with plenty of people, it was easy.

Now the work starts in refastening the coverboards, refinishing the deck, and getting her ready to go in the water.

we have a wooden dinghy race in May, and I'm hoping to have her ready for that.


Here is the crew that showed up to help.   They were awesome!
on the ground, almost ready to rol

The snipe fleet on the partially stripped deck.

Here she is after getting right side up for the first time in a long time.  I had almost forgotten what she looked like


Removing the bungs from the coverboards, the coverboards were fastened with galvanized steel, while the rest of the deck planking was put on with bronze. so only two boards to remove.

Thursday, February 15, 2018

Seam putty


While I was waiting for the Mahogany colored boatLife LifeCalk to arrive from jamestown, I had a few final patches to execute up on the stem.  There were two areas where the ends of the plank had some rot; one due to a rusted screw, and the other due to a deck screw that had split the plank (the sheer plank).   for both, I decided to just scarf in a small piece of wood, since the problem was only on the surface of the plank.  both went on pretty easily, and seem solid.  with the screws in and new bungs in place, the scarf it sandwiched in place and should go nowhere.


Here is the middle plank scard after being planed down and before I redrilled
Redrilled (not a very good job of it) and screw in place


Here is the sheer plank area with the dutchman in place but not drilled.  cotton handing out ready to be driven back in

All repairs complete, bungs in place and cotton driven home.  The two patches should blend better once they have some varnish on them, but due to the discoloring at the chine, that one may still stand out a bit.


Putty is in and the tape is off,  I'll need to work on some of the discoloration, but I think this think could float! Next Stop, sanding after the cure is complete

here we are with most of the caulk on and the tape still in place.  I ran out with about half of 2 of the seams payed

caulk in place


bottom with the tape off.


Last shot of the bucket of screws before it goes into the recycling.  Did I mention Over 700!


Need to wait a few days for the LifeCalk to Cure. in the mean time I'll be working on the mast

Workplan still says done by Late April. WOOT!

Wednesday, January 31, 2018

Bungs in, Trimmed, and Primer on

Made some progress this week; was able to get all the bungs into the boat, trim, plan and sand them.  This was an eye opening moment in that I originally ordered 500 bungs from Jamestown, but ran through them after only finishing 2/3rds of the boat!  So just now realizing that refastening this thing meant replacing over 700 screws.  no wonder it has taken so long.

The biggest struggle with the bungs was that many of the countersunk holes had been damaged during the removal of the original screws, or were too shallow.   for some, I was about to just drill the hole slightly deeper, in order to get a good seal on the bung.  For those that were already too deep, i had to bore out to the next size bung, in this case from a 3/8 to a 1/2 inch bung.  this worked pretty well since, although the larger bung stands out somewhat due to the larger size, the new bore allowed them to fit snugly.


Since the last post, I had a bit of a setback.  I had started paying the seams with Interlux Seam Putty.  I was using the brown putty for under the waterline.  On a whim, I called Interlux to ask if I could use the brown putty on the topsides.   When I told them this boat was intended to be dry sailed, and asked, do I need to use the white topside putty too? they said, "I wouldn't use either, the brown putty will dry up and crack if its not in the water."    They reecommended I use BoatLife Life Calk. since it won't harden.   Its in the mail.


So I had to remove the putty that I had put on last week, not a problem, it was pretty soft and pliable, and my trusty reefing iron that I made about 6 years ago at the beginning of this project, came it handy.   only took about an hour to remove.

The good news is that according to my super nerd man Microsoft Project Plan, I am still on target to get this think in the water in late March.  That is exciting.

So tonight I finished putting on the first coat of primer.  Interlux Pre-Kote, to be precise.  Went on pretty easily, and seems to be the right stuff to use in this scenario.  Once I get the BoatLife Calk I will pay the seams and then add another coat of primer.   I will also need to fair out a few areas where there are chips scratches and tear out below the water line.  i think I'll use west system epoxy with fairing additive... but maybe I should call interlux first to make sure I don't screw it up again.


Wednesday, January 17, 2018

Paying Seams. Bung repairs

I have been working on fixing any screw holes where the plugs don't fit tightly; normally this involved drilling the courterbore slightly deeper so that the plug will seal, and in some cases I have to move up one size from a 3/8" plug, to 1/2".  Over all pretty easy, just takes some time.

As for paying the seams.  I am using interlux seam putty below the water line. I started out trying to do this using a putty knife, with poor results.  So I moved on to plan B, which was to thin the putty slightly with paint thinner, then pack it into a caulking tube from west systems, and then apply it with a standard caulking gun.... much better results.

I did realize that I had the process order a bit wrong.  Should've done the bungs, then trim them, then caulk, and then pay the seams.   will do better on the other side of the boat.


Here is the seam that was produced by using the caulking gun... much cleaner


added some glazing in the topsides just to see how well it will work,  Looks good. not sure if I should tint it or just go with white?


caulking from the stern

More planking glamour shots

Planking complete, Starting to Caulk

Now that the planks are back on, its time to caulk the seams, pay them with putty, fit the bungs, prime, and paint.  Not necessarily in that order.  In fact, I'm a bit perplexed about the right order.

Is it caulk, prime, bung, putty, prime, paint?   I read that after hammering home the caulk that you should paint the caulk to keep it from expanding.  so thats what I did, but I hadn't put in the bungs before that. So I'm a bit out of whack.

I used cotton and oakum, depending on the size of the seams.  The two main seams under the chine got oakum, as the cotton would push through the boat since the gaps were large.  I originally assumed I'd have to put in softwood splines, but the oakum seemed to work no problem, and saved some tasks for splining on my workplan.  Yes, I'm a nerd, I have a full workplan in MS project.  Current projected completion date is 4/23/18.   woot!   Lets see how long that lasts.


Old school, Beetle and oakum, you can see the oakum in the seam on the bottom right.

Oakum closeup

Had to do a lot of work on the stem because the screws were not drawing up tight and the counterbores were too shallow to hold the bungs.   also, this area had a ton of bondo on it which had to be heated and brushed off.    Looking much better here.

started by caulking the garboard seems and then painting them with primer
worked my way out towards the chine, priming after each seam
My assistant, and bung hammer extraordinaire


almost finished on this side with the bungs.  Still some to fix.  often have to pull the screw, deepen the counter-bore and retry

Friday, January 12, 2018

January Planking

Happy New Year!

My resolution was to get this thing done in 2018.  One motivation is to get it on the water sailing again, the other is that my wife said I can't get a truck until its out of the garage. BOOM! instant motivation.

So when we last talked, I was still doing rib and plank repairs and cleaning out the inside.   That is now all done.   I was able to get a couple of coats of varnish on the interior as well.  So I decided, "its good enough" and started focusing on moving towards completion.

So I focused on getting the planks back on.  voila, focus=results.

Pics below show the final state of the interior prior to getting the planks back on.  once the repair work was done, the planks went on super fast.    I had a few trouble spots where the planks were not pulling tight or where the board repairs were too thin at the narrow ends of planks on the stem.  Those were pretty easy to fix, either with more resin, or plugging the bad screw holes that I missed that led to the planks not sitting fair.  So it got a bit fiddly.

you can see the blue paint around the centerboard; I had originally thought that I'd need to install the centerboard before flipping the boat over to start on the deck, so I started painting around the trunk, so I wouldn't have to do it while the board was in, which might lead to drips on the board itself. In the end, I decided that the centerboard can be installed from the top, using the main halyard, as the slot in the top of the trunk is clearly shaped to allow the board to fit.


interior varnish showing the transom.  it cleaned up OK

Varnish on the underside of the deck  and the centerboard trunk

Interior looking aft
Last board to go on in the garboard top right.  it was sitting in place waiting to have new holes drilled

and there you have it!  All planks back on.  Whisky please...