Wednesday, June 8, 2016

Mast Repair for Snipe 3445

Had a fun diversion last weekend.  My friend Gigi also has a Snipe from the 1930s.  Her boat was restored, and the original mast was deck stepped.  At some point, someone had converted the mast to a keel stepped mast and had added a section to expend the mast.  Unfortunately. the joint that they used to adde the extension was a butt joint, with a small bit of fiberglass cloth to hold it together.

We were supposed to sail in a wooden dinghy regatta on june 5th, but when Gigi went to prep the boat 2 weeks prior, she realized that the mast joint had spontaneously separated while on the rack, since the last time we said it.

So a repair was in order.  

We brought the mast back to the man shed and started to work, we realized there was some rot in the original extention.  Since we knew that we'd need to scarf in a new section to create, and we didnt' want to mast to have a three piece mast, we decided to just build a new bottom piece from scratch.

Gigi go to some mahogany and western red cedar from the lumber folks, and we set off to building a new mast.   Here is a picture book on the work.  I'll try to add some before pics, and also some pics after the varnish goes on.  Enjoy...

blank for the bottom section, including the 8:1 scarf angle and a core through the center that will allow the halyards and then also accept a section of mahogany for the bottom

the other side for the scarf blank

Starting the scarf.   did this with hand planes.  started with a stanley scrub plane and then finished it off with a #3

the finished scarf ready for the extension

the glue up of the bottom section

glue up of the mahogany bottom.  This section will be planed to dimension, then the top 3 inches will be turned to a round post on the lathe.  Then it will be inserted in the core at the bottom of the extension.

The glue up. the piece on the top is a strip the provide a face for the pulleys that will be inserted to turning the halyards. without this piece the pulleys would protrude from the mast. this also alows the pulleys to align with the center of the mast core for the halyards.
The glue up showing the scarf angles
the glue up once the clamps came off

the start of the wittling proces.   started by cutting off the protruding sections with a gents saw

started removing the bulk of the mass with the scrub plane

more bulk coming off with the scrub plane

almost there, final form is taking shape

After the final sanding.  now on to varnish....... next time

Monday, February 29, 2016

Planking

Planks are going back on, which is very exciting.  I've learned that restoring an old boat takes a long time. My father said, "boy, you could have built a whole new boat by now".  He's right, restoration is definitely "fidly".   

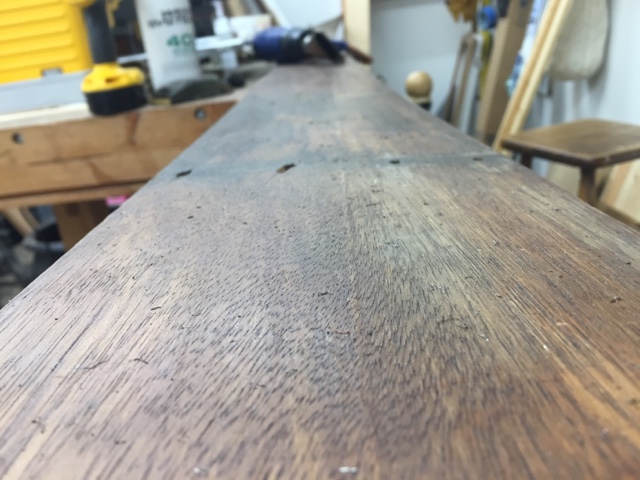
One thing I've learned is that there is a log of work required to prep the planks.  In a new build, once its cut and shaped, you slap it on and drill and screw.  In this case, each existing hole has to be examined, and if its in bad shape, it needs to be repaired.  this can be done either with plugs, or with epoxy.   both equal more time.

So far, two planks are back on and screwed in;  screwing takes no time at all,  The brace and bit make short work of if.  The only problem i've run into is that one of the screws that is going into a replacement oak rib sheared off.   all the screws in that rib are resisting a lot.  I tried some wax on the screw,but still not able to turn them home.  need to think more about that one.

The bright side is that the new chine log is doing a great job holding the chine planks in place, and looks great.  Makes a huge difference in the boats structure replacing the rotted old one.  Only two more planks on this side of the boat, then I restart on the other side fixing ribs and iron sick screw holes, and stripping varnish.

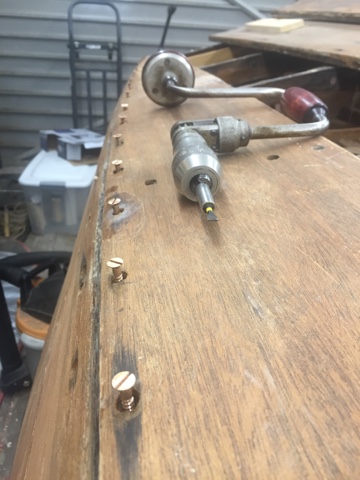
Brace and Bit ready for action driving new screws into the chine log.

Friday, February 26, 2016

Plank Cleaning

I've been prepping planks for re-installation.   Its a slow process, but the results are worth it.  I'm I've already stripped the majority of the varnish and paint that was on the inside of the boat.  most of it was done when the planks came off; now I'm working to remove the residue that remained.  I've been doing this with a heat gun and #3 steel wool.  Its a good method for these mahogany planks, but I've heard that using steel wool isn't good to use on oak, because bits get in the wood and cause rust stains (but haven't confirmed that myself).

Before I started this process, I removed the bulk of the varnish and paint with a heat gun and scraper, being careful not to scratch the wood.  that then leaves some areas of thin varnish

Ultimately, this isn't a sanding operation.  You don't want to use the wool to abrade the varnish or wood.  Let the heat gun do the work.  I let the gun sit on a spot for about 5 seconds, then lightly wipe with the wool.  The idea is that the wool picks up the liquified varnish, and it gets trapped in the wool and pulls away.  After a while the wool gets matted with varnish and you need a new one. 

Here are the tools of the trade.  heat gun, steel wood (about half way through its life), safety glasses, gloves, and a respirator.  The respirator is a must, I did a few days of this without one, and found that my mental capacity at work was limited... oops.


Here is the latest victim, not bad for a piece of wood that was first screwed onto the boat 80 years ago.

Monday, February 15, 2016

Valentine's Day Update


Got some varnish on the interior of the boat today.   Will start putting on planks, rather than taking them off, soon.   This varnish work is somewhat slapdash, but its all interior, and this boat needs to get in the water, so I'm not striving for perfection.


Monday, January 18, 2016

January Update


I'm almost ready to start varnishing the interior prior to reattaching the port side planks 

Below, I cleaned up the brass/bronze brackets on the center rib.   I ended up not buying new ones, but instead I refurbished the jagged rough originals.  Some filling and steel wool and they were transformed.  


Almost done cleaning out all of the paint and bubbling varnish on the interior. That has taken a long time and I finally started to use a respirator, which wasn't smart to do it without.  


I starte applying varnish to the transom in order to orotect it.  There are a few rou spots where there has been a motor attached, but I can live with that.


I took the time to order the right size plug cutter so that I could fill the larger bolt holes in the keel.  When I first got the boat, these were filled with putty, this will be a much better option.


At this point the work on the port side is done, I there than varnish and reattaching the planks,  next step, remove the starboard planks and do the same on the other side.